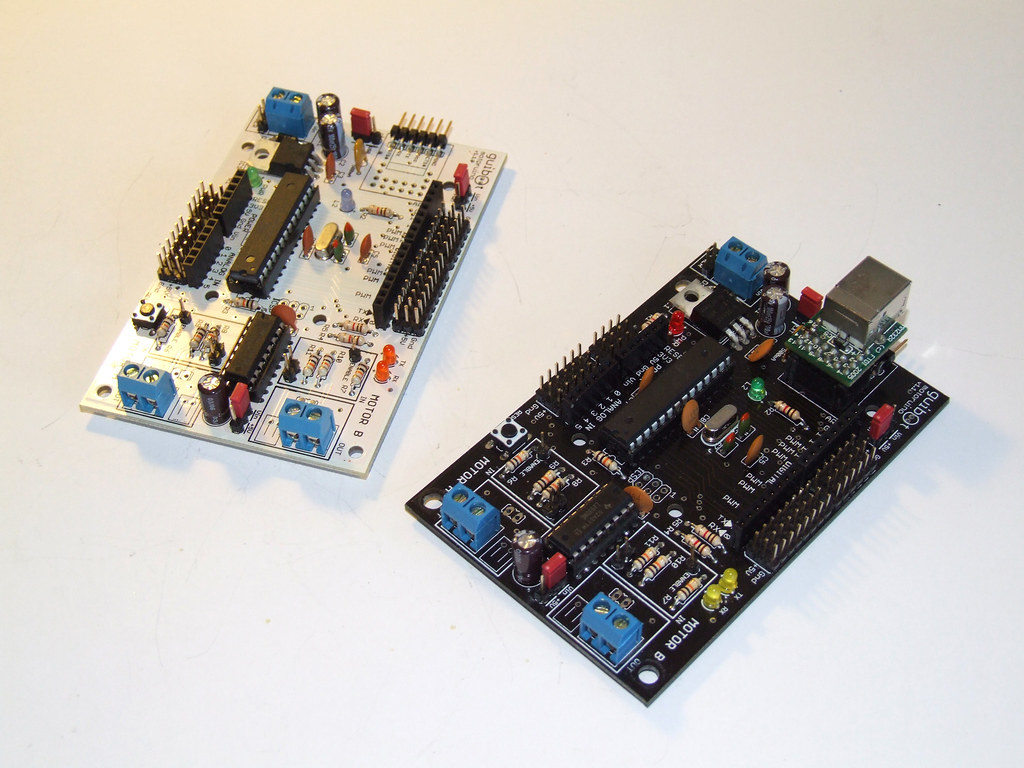
It’s a pleasure to present the new release of the Motoruino boards!
Kits will be available in June ‘ 2010, visit http://guibot.pt to read more information about the boards, prices and distributors.


It’s a pleasure to present the new release of the Motoruino boards!
Kits will be available in June ‘ 2010, visit http://guibot.pt to read more information about the boards, prices and distributors.

This project is a collection of experiences related to seeing and percieving the world from the point of view of robotic creatures. Robots will send sensor data to the computer and will generate visual and audio landscapes in real time.
The development started during the Audiencia Zero residency in O Espaço do Tempo in Montemor-o-Novo, and will continue until the final exhibition wich will be in July.
This is a colaborative project where many friends are bringing together their skills, until now we have collaborated with:
– Pedro Ângelo with Serial Communication;
– Rui Madeira with computer vision technics and advanced maths;
– Sérgio Ferreira is a media and interaction guru, always providing precious help and advice;
– Daniel Gomes is working on a MAXMSP interactive sound;
– Nuno Morgadinho is developing an online application to remotely control robots.
– André Almeida is a computational guru and a great technology and interaction advisor.
More to come ;)
Sub-projects list:
This is the first iteration of this project, and just a quick test for something greater.. hope to have time for it in the future.
Components list:
– Motoruino (Arduino compatible board) up and running;
– Wireless camera and video converter sponsored by O Espaço do Tempo;
– Basic pan/tilt system built with PVC;
– GUI written in Processing enabling robot remote control, gives vision feedback and servos orientation.
SOURCE CODE FOR ARDUINO AND PROCESSING
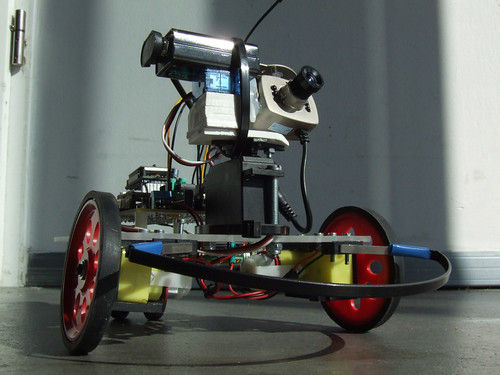
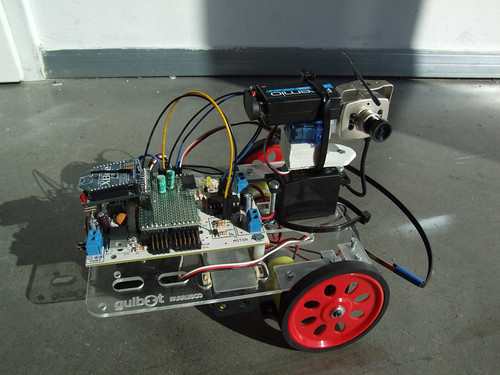
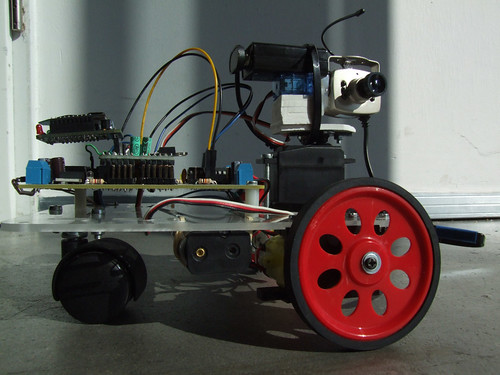
The motoruino is so easy to setup, just plug the motors, sensors, upload code and your bot is ready to go.
I added a big capacitor (4700uF) on the PCB power connections as I had the Motoruino resetting randomly when a motor started (OddBot explains everything here)

This is a quick test drive with the demannu (unnamed bot).
Motoruino page: www.guibot.pt/motoruino
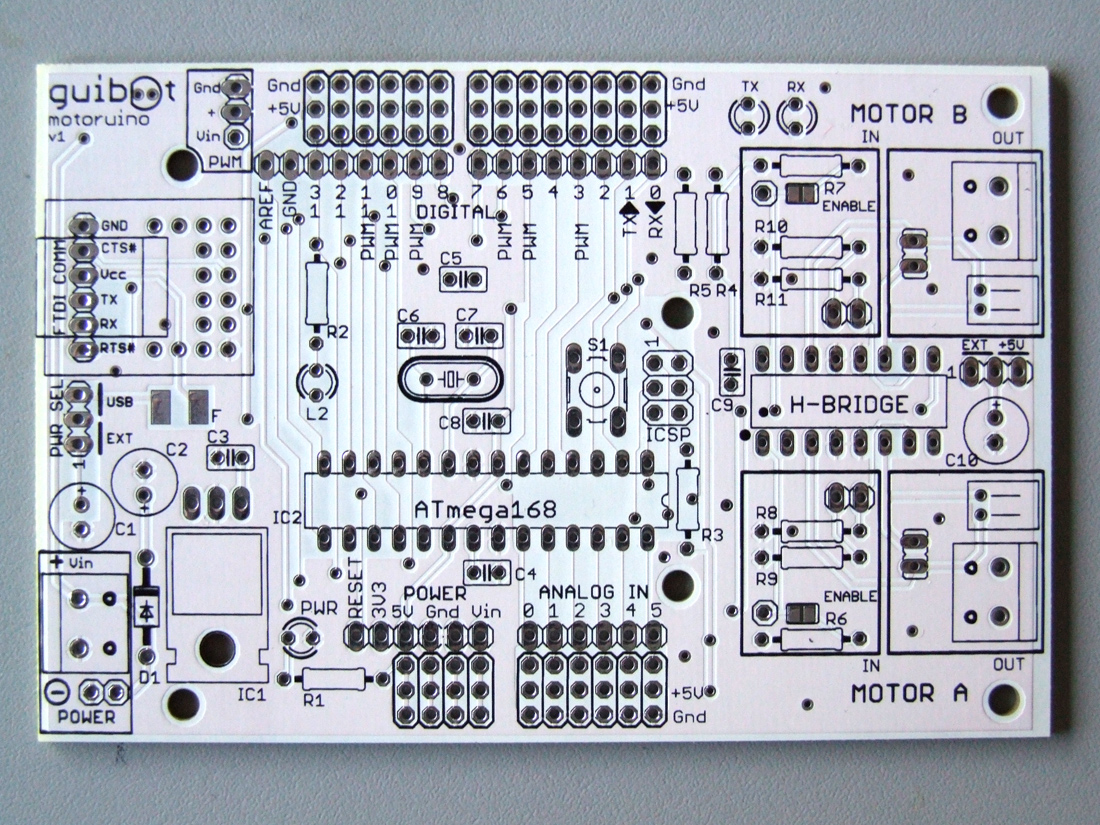
It´s since I started with robotics, that I felt the need of having a board where I could directly plug-in my motors, servos, sensors and all the stuff without having to purchase extra shields, or building pcb’s and soldering and troubleshooting and hours and hours of hard labour.. so, I decided to start designing a new Arduino board. When I mention design, I didn’t actualy design the board in cad software, this amazing task was accomplished by my friend David Palma.
We talked a lot about usability, electronics and how to introduce robotics to newbies, and this is the first batch we ordered. We are working on a new batch with more layout improvements.
Main key words:
– easy to use, understand, play with;
– must be a plug-and-roll board;
– to be suitable with shields, and with regular Arduino Diecimilla/Duemillanove boards;
– the usage of the H-Bridge is open, i.e., there aren’t any Arduino output pins assigned, the user can use the bridge the way he/she wants;
– motors supply and PWM pins might be used with external voltage or regulated 5 volts
– motors have 3 different connectors, screws terminals, male headers, JST connectors
– two possible FTDI/USB connections available:
1. USB / TTL convertor, there are some choices on the market for this one, you can have it in the form of a cable, or in the form of a small pcb
2. USB adaptor with the FTDI chip embedded
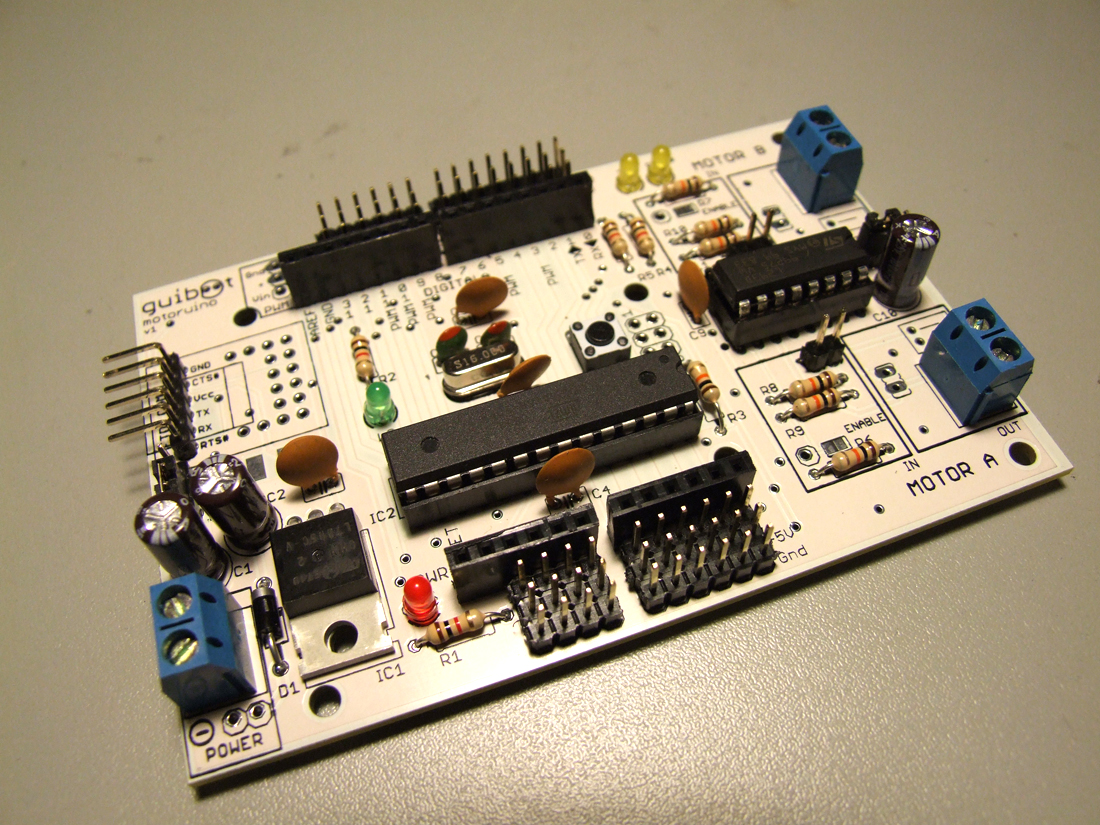
The board fully assembled is pretty neat and clean.

Next batch will be in black :)
I’ve found this two rc vehicles on a junk, they are in a very bad condition. The big one has the DC motor burned out, I will try to replace it.. brushless motor maybe.

They both have two different gear mode (hi and low speed), I am wishing to try it out.

This is the dead motor..
The small car doesn’t have the rear suspension, I could try to rebuild it but I wanted to try something different with this one. I want to go for a chopper tricycle style :D


It’s a bit weirdo, and I’m very unsure if this will work, but I will give it a try.. If it fails, I want to try with one of the original wheels on the front, the reason I didn’t try is because I don’t have a way to hold the front wheel right now, I must look on a hardware store for a strong wire and it is 2 AM right now.

Is much stylish this way, definitely, this way it would be an all terrain tricycle!! :D
Two more infrared sensors were added on the front, this way he’s more sensitive to the environment. Video is on the go..
You can see more details about the construction process on this post.
Updated version here.


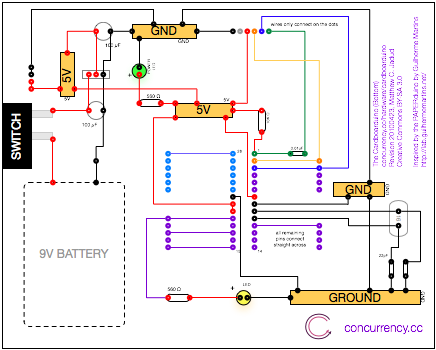
Everytime I see PAPERduino’s being featured in blogs, websites, and other people projects I feel joy! This time I have the surprise of looking at the Concurrency website, the new multithread language for Arduino, and I see the PAPERduino giving this guys the ideia of taking it to a higher level, I present you the Cardboarduino: “The Cardboarduino is physically larger than the PAPERduino, and includes space for a 9V battery clip.”
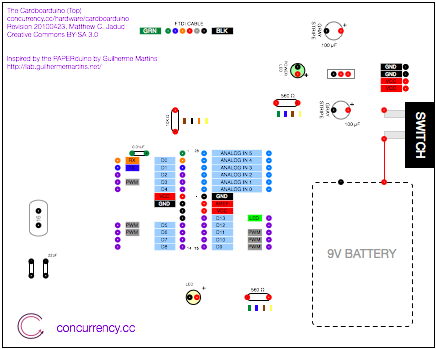
The bottom shows all of the pins that need to be soldered together with wire.
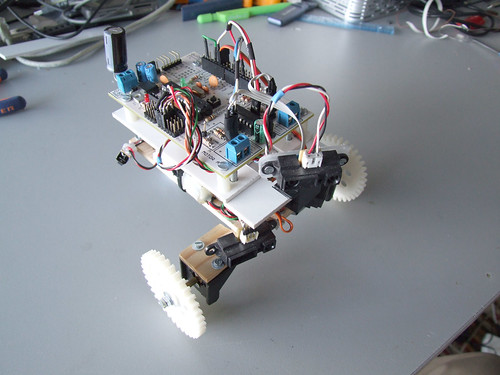
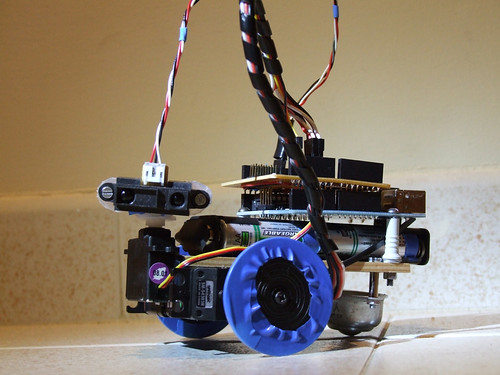
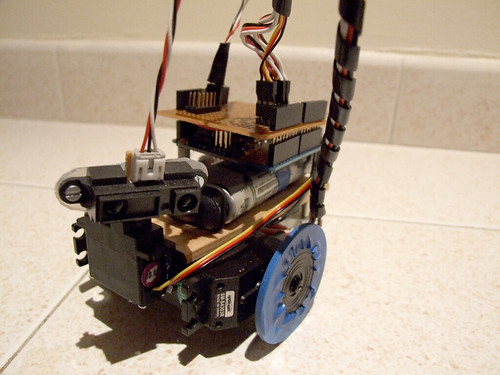
It’s been quite a while without building robots… errr.. creatures..
anyhow I’m releasing this new creature, wich is still a work in progress.. and since I can’t think on a name for it, I will call it demannU, witch is “unnamed” backwards… sounds like ‘demon’, and for the sake of insanity, it looks like a little demon..

the wheels where designed by Catarina Mota, and if you go to thingiverse, you can download the source code, and print your own wheels if you have access to a 3D printer
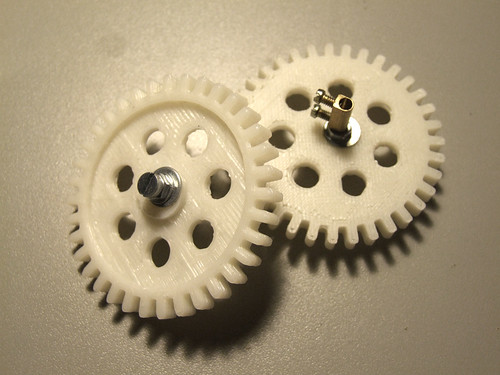
pololu mini gears, i strongly advice this motors, very powerfull and fast
this bits will be the motors supports

and after some dremel work they look nice and ready to hold the motors

the chassis, this time I wanted to try wood, it’s quite good to work and to do fast prototyping


et voilá

It isn’t finished yet, but I wanted to share with you :) will add more sensors and more cool stuff as soon as I have time
updated version here: http://lab.guilhermemartins.net/2010/02/09/demannu-update/
![]()
I was invited to assist Mitch Altman during codebits. I believe it is going to be an amazing experience. :)
I will also talk about Creative Robotics on Friday at 2PM.
Filipe Valpereiro from InMotion.pt will talk about Arduino, and Rui Madeira will talk about OpenFrameworks.
Hope to see you there ;)
May I introduce you to the new family members: Farrusco v2.5, and Farrusco Junior.

Farrusco v2 is the new generation of my first robot Farrusco.
The F2 was created with Filipe Valpereiro from InMotion.pt, and this was the robot used for the last robotics workshops season.

The F2.5 version has a cleaner design, we are using two modified servos to work as DC motors as you can see in this tutorial, the motor driver is an ardumoto, and soon I will upload more photos with new addons.
Farrusco Junior is another iteration, he has two modified servos and a small chassis. The modified servos operate as normal servos but they rotate 360º continuously, and you can learn howto hack them watching this video tutorial (in portuguese).
This robot is still a work in progress, and I will upload new pics soon.
All the components were sponsored by InMotion.pt.
