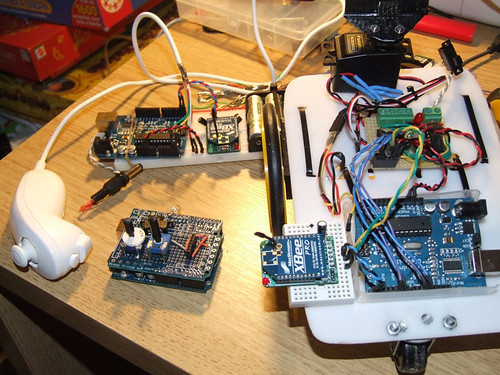
I wanted to keep working with the XBee modules, and I thought it would be cool to control Farrusco.
So, first I used 2 potenciometers and assigned one to each motor.. and then I used a nunchuck controller.
Both require a learning curve and it’s only after a while that you start to feel the touch :]
This is the code I´m using to control the robot with the Nunchuck
Parabéns, excelente projecto, continua o bom trabalho ;)
Obrigado TigPT, espero em breve ter mais novidades :]
Pretty cool Guibot, ought to post this on LMR!
Thanks robologist !! Will do :]
Hi Guibot,
Very nice project, well done!
I like to show your “Farrusco RC” project to my students.
I have a question regarding codes that you use in transmission. There are two .pde files in “Arduino_Nunchuck_Farrusco_SENDER” folder.
How did you load two .pde files into an Arduino?
Or, the two .pde files need to combine into one .pde file.
Thanks and best regards,
Billy :)
Hello Billy
I’m so glad to know you are thinking in showing this project to your students. What kind of class is it? I would love to know your students feedback! :)
As for the two files, you have to open the main file with the Arduino software, in this case it is Arduino_Nunchuck_Farrusco_SENDER.pde. After opening this file, the other file will show up on the next tab.
Good luck ;)