I couldn’t let this pass by without announcing it here, it’s just a simple tool to interface Max with Arduino back and forth.

I couldn’t let this pass by without announcing it here, it’s just a simple tool to interface Max with Arduino back and forth.
ABS warping and PLA broken filaments is a very well known issue in the 3d print world! At Artica we have our good old BFB3000 and we solved this problems using what I have later proudly called “mancave solutions”!! :D
Here I am using a heater pointed to the printer, this keeps the object and the platform quite warmy! and it works flawleslly! Besides it keeps the room quite warm wich feels good under the winter.. summer will be much hotter I suppose!!
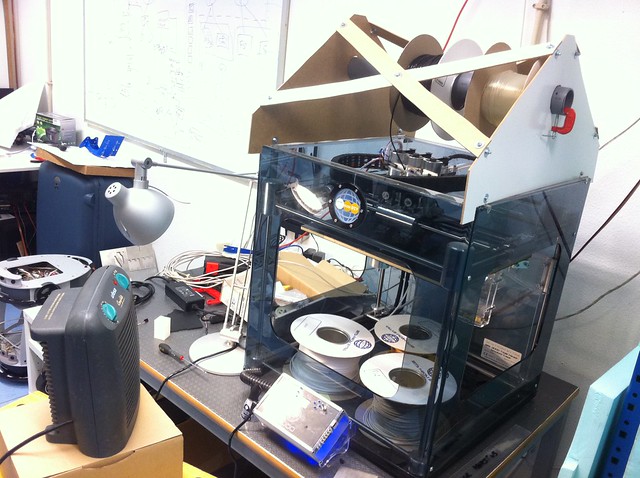
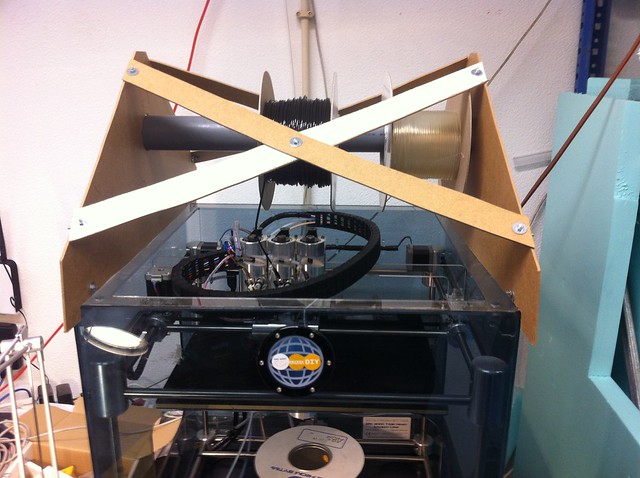
PLA filament lose elastic properties through the time and on the BFB3000 it simply snaps inside the rubber tubes.. I created a roof on the top of the printer as you can see, the filament enters the print head without any stress and no more snaps!

And the result is awesome!!
Magabot is an open hardware and software robotics platform designed to stimulate creative minds.
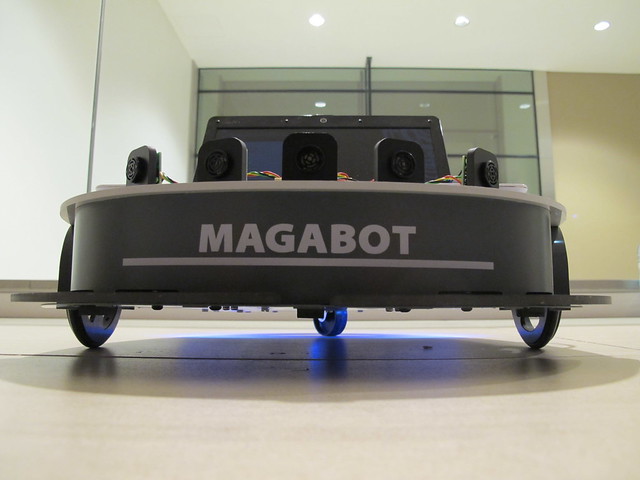
Any robot with a computer is a very powerfull robot, and because all laptops have a camera, a screen, speakers, microphone, batteries and usb interfaces, your robotics experience will be empowered with Magabot.
This project is being developed in a partnership with IDMind, Artica and with the participation of Francisco Dias.
The Software:
Many applications are being developed right now, follow colors, wall follower, face detection, among many others.
We will provide interfaces for VisualStudio, .NET, c#, c++, openFrameWorks, Processing, Arduino, Flash, Unity3D, MAXMSP, PD and if you feel like you want to develop your own interface you will be welcome too, we give full credits on everything.
You will be able to download apps for the Magabot, to develop your own apps, and if you feel they deserve money, you will be able to sell them too.
The hardware:
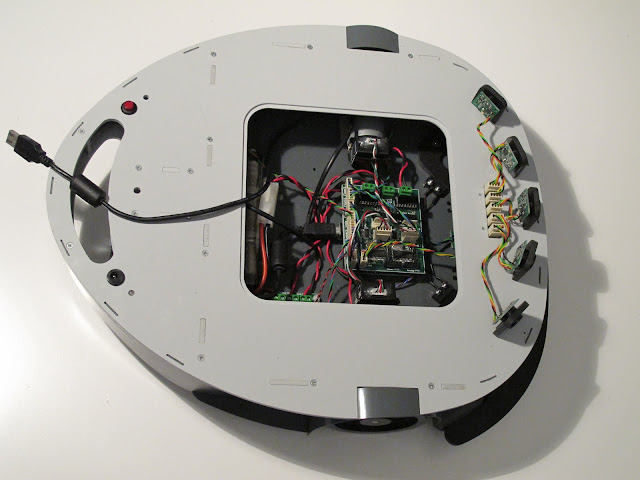
The hardware is made with rigid PVC and a differential drive chassis with highly precise encoders on both motors at the commands of an Arduino and a customized shield. You’re completely invited to change and adapt it to your needs.
The basic setup integrates:
– PVC chassis with DC motors with encoders;
– Three Infrared-sensors on the bottom to detect stairs or lines;
– Two bumpers on the front to detect collisions;
– Three RGB leds if you are in the mood for some tuning;
– A battery sensor to know how if it is in the need for some juice;
– I2C bus on top to connect any I2C devices;
– A 7.2v battery and a charger.
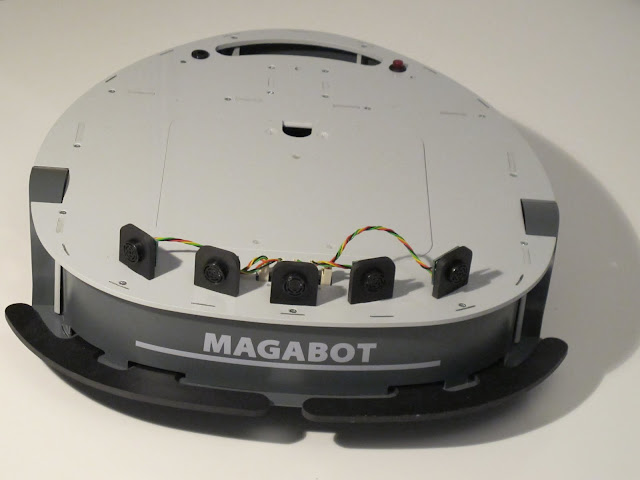
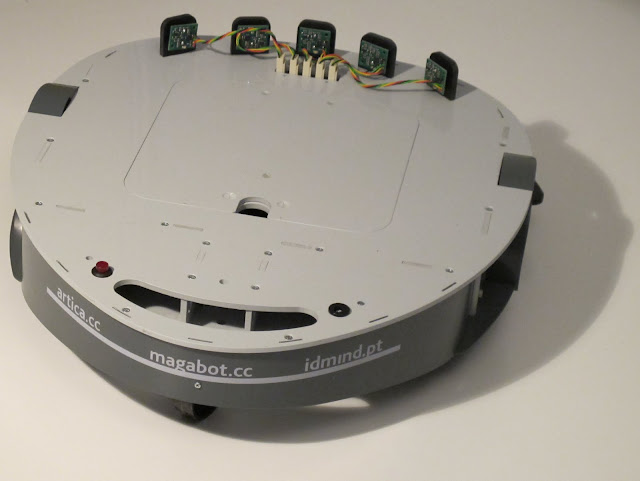
Add-ons built at the moment:
– Pack of 5 Maxbotix sonar sensors with PVC supports to connect to the upper I2C BUS;
– Other add-ons are beeing developet at the moment.
– – – – – – – – – – – – – – – – – – – – – – – – – – – – – – – – – – – – – – – – – – – – – – – – – – – – – – – – – – – – – – – –
We lauched the magabot.cc site today, this website will be a repository for informatiom, source code, apps, hacks, support forum, and a place to buy Magabots.
– – – – – – – – – – – – – – – – – – – – – – – – – – – – – – – – – – – – – – – – – – – – – – – – – – – – – – – – – – – – – – – –
Magabot is a protoproduct, we are commercializing our open source and open hardware best prototype at a low cost:

If you buy one you will automatically enter on our beta test program, we invite you to share your experiences and to post your results, we will also provide you with support for you to be able to use it, change it, and play with it.
The current price for the platform wthout the sonar kit is 250€ plus VAT.
The current price for the sonars kit is 100€ plus VAT.
If you need more information please contact us: info [at] magabot [dot] cc
At Artica, we had a request to link MAXMSP to an industrial motor for an artistic installation witch we will speak about at another time.
This motor is a true beast, and since we have never worked with such a thing we decided to ask for help to our electronics guru David Palma.
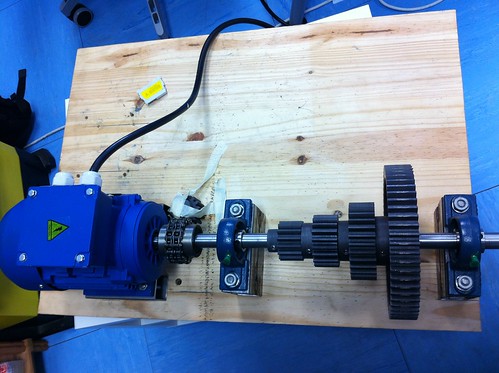

The motor controller:
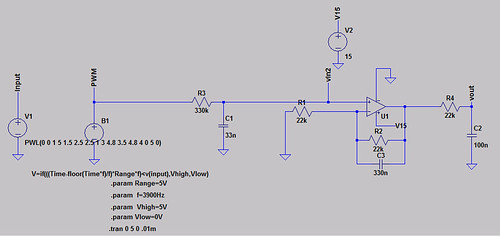
David developed an electronic circuit to simulate a PWM analog output from 0 to 10v (originally it gives 0 to 5v), and another circuit to switch motors direction, both circuits were assembled on a shield and connected to the motor controller.
The first circuit is a transducer:
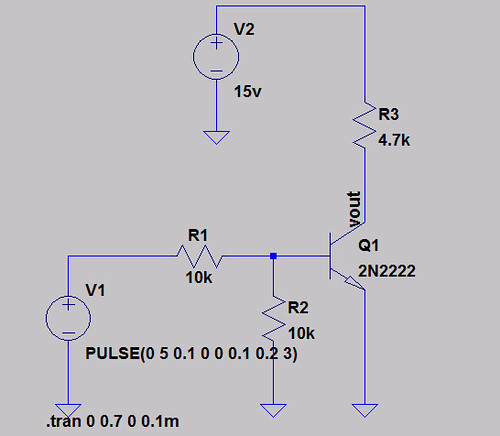
And this is the switch circuit that tell to the motor controller wich direction the motor will spin:
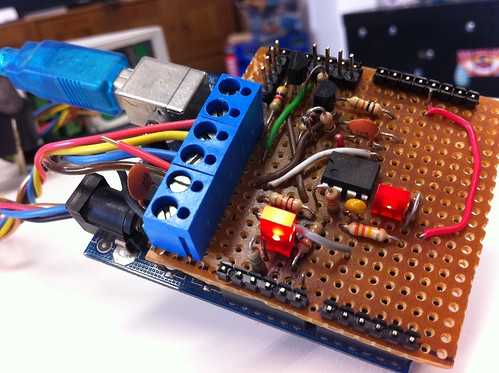
Then he builded an Arduino shield:
And the final part was the Max patch that send the direction states and the PWM values to the Arduino:
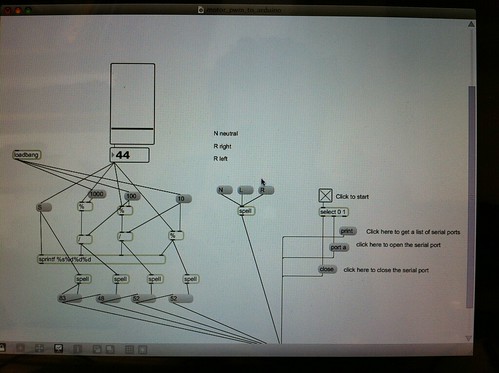
And this is the result:
MAXMSP – ARDUINO – INDUSTRIAL MOTOR from artica on Vimeo.
And last but not the least all the source codes can be downloaded here
No último sábado, 5 de Fevereiro, o altlab organizou o Arduino Hack Day.
Participaram no evento perto de 40 pessoas, entre entusiastas em electrónica, artistas, programadores, arquitectos, fotógrafos, amigos.

Para muitos, foi o primeiro contacto com o Arduino, a descoberta da simplicidade desta plataforma para o desenvolvimento de projectos de computação física.
Distribuídos por quatro bancadas, os participantes começaram a experimentar assim que chegaram!


Uma das bancadas, dedicada ao tema Arduino, motores e a robótica, ficou por conta do Guilherme Martins (Guibot). Noutra bancada, alguns principiantes aprendiam a dar os primeiros passos, com a ajuda de membros do altlab.


Enquanto isso, a impressora 3D (“makerbot”) trazida pelo nosso convidado neozelandês, Tiago, ia imprimindo as primeiras peças.


O Pedro Ângelo, do LCDLab, veio do Porto para nos ajudar e ressuscitou um projecto antigo do Maurício, que depois de pronto gerou alguma diversão…

Arduino Hack Day – FIRE! from altlab Lisbon's Hackerspace on Vimeo.
Logo depois do almoço começaram as apresentações. A Mónica Mendes e o Maurício deram a conhecer o colectivo altlab, o seu passado, presente e futuro. A Cheng Xu, também nossa convidada, apresentou-nos o Seeeduino Film. Por fim, o Guibot e o André, da Artica, falaram do Motoruino e do Farrusco.


Passadas 10 horas de puro hacking e muita cerveja, o Arduino Hack Day chegava ao fim, todos os participantes muito satisfeitos com a experiência. O altlab conseguiu concretizar o principal objectivo desta iniciativa: juntar pessoas interessadas em partilhar conhecimentos sobre o Arduino, ajudar quem nunca tinha desenvolvido nada com a plataforma e conquistar novos interessados em pertencer a este colectivo fantástico!
ArduinoHackDay @altlab from Rita Carvalho on Vimeo.
Por último, fica aqui um agradecimento muito especial aos membros do altlab que contribuíram na organização deste evento:
Andre Almeida, Ferdi Meier, Guilherme Martins, Leonardo Marques, Manuel Alves, Mauricio Martins, Mónica Mendes, Nuno João, Paulo Rodrigues e Pedro Ângelo (LCD).
Some photos by João Nogueira e Rita Carvalho.
Flickr Photo Set: http://tinyurl.com/6f7vhsx
English version soon!
We at Artica are taking this manifesto very seriouslly:

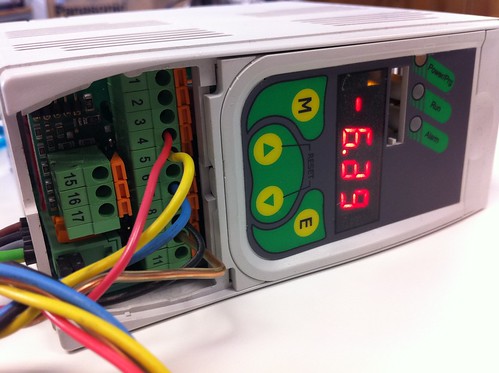
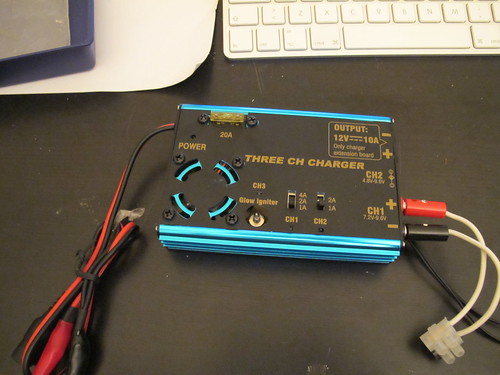
Due to a stupid mistake (inverted power wires), this battery charger (the best that my fingers ever touched) smoked for a second or two:
When we opened the case, there was this little SMD with a strange eruption result of an overburn, it was definetely what got burned, and it has written on it 7805 (photo out of focus unfortunately)
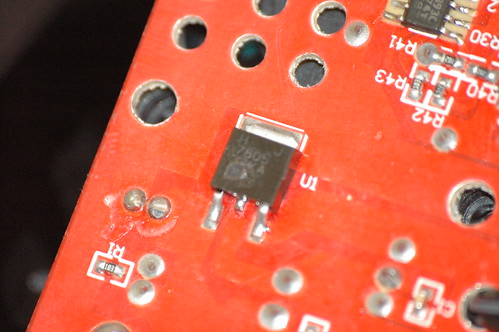
This IC is very common in the electronics and robotics fields, it is a voltage regulator and in this case it regulates incoming voltage to 5 volts. We got a few 7805’s laying around and decided to take a try repairing this because we need badly to charge Farrusco’s batteries.
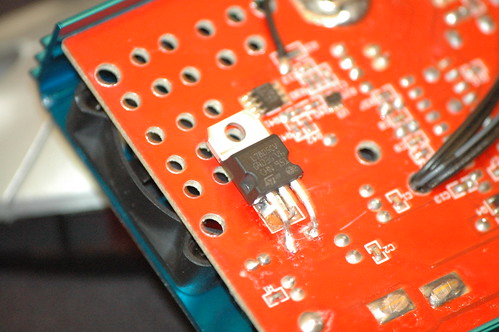
This is the result.
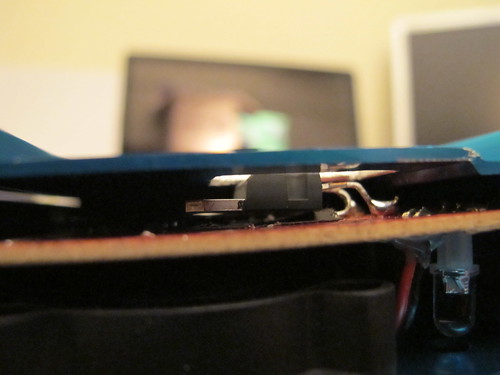
Not bad IMO! :)

A hole was opened to completely close the case, and it is now ready to roll, I mean charge again.